
New Wells · Installing Your First Well
After the Drill Rig Leaves: pump, tank, trenching, and first test
What happens between drilling a new well and drinking from it, including pump installation, trenching the water line, connecting to the house, disinfection, first water testing, and setting up records.
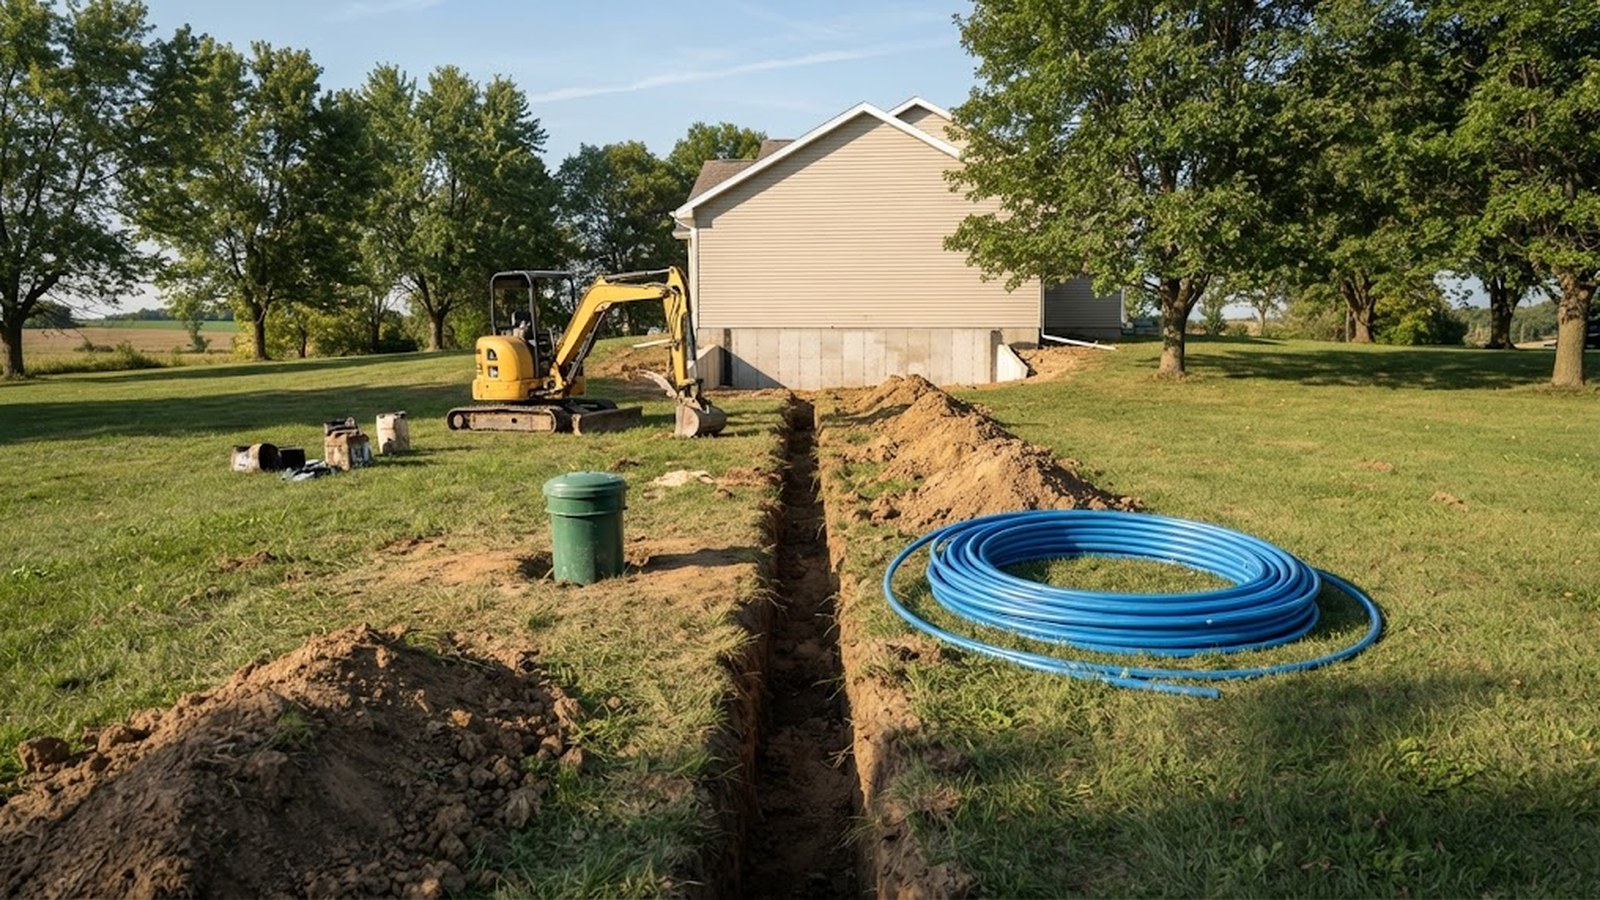
When the drill rig pulls away, it is tempting to feel like the hard part is over. In a sense, it is. The biggest uncertainty, whether and where you would find water, has been answered. But you cannot drink from a hole in the ground with a cap on it. Between drilling and your first glass of water, several more steps need to happen: installing the pump, running the water line, connecting to the house, setting up the pressure tank and controls, disinfecting the new system, and testing the water.
This article walks through those steps in order and explains what homeowners should expect, coordinate, and keep track of. The work itself belongs to licensed professionals, including well contractors, pump installers, electricians, and plumbers, following state and local rules. Your role is to understand the sequence, keep everyone coordinated, and make sure nothing gets skipped.
See every step between drilling and drinking at a glance
Most new wells go through steps like these after drilling:
- Protect the wellhead until the rest of the work is done
- Plan the pump system based on the well's yield and your household's needs
- Install the pump, drop pipe, wiring, and pitless adapter
- Trench from the well to the house
- Lay the water line and electrical wire
- Backfill the trench carefully
- Install the pressure tank, switch, gauge, and controls
- Connect the electrical supply
- Connect to the house plumbing
- Start up the system and check operation
- Disinfect the well and plumbing
- Flush the system
- Test the water with a certified laboratory
- Decide on treatment based on the results
- Document everything
Timing varies. On some projects, all of this happens within days of drilling. On new construction, the pump may be installed right away but the connection to the house may wait until the house is ready.
Keep the wellhead safe from construction while you wait for the pump
Between drilling and final connection, the well is vulnerable. Construction sites are busy, and a well casing is easy to hit, bury, or contaminate. Keep the cap secure and put a visible barrier around the wellhead so crews can see it. Keep fill, debris, and building materials away from it, and keep fuel, chemicals, and concrete washout far away, since anything spilled near an open or damaged casing can end up in your water. Also watch the grading so the ground slopes away from the casing and runoff does not pool around it.
Our article on choosing where to put a new well explains how to protect the site during construction.
Match the pump system to your well and household
The right pump system depends on several factors. These are the well's depth and water level, and the well's yield, as observed during drilling and any flow testing. They also include your household's needs, such as the number of bathrooms, fixtures, and people, and any irrigation, livestock, or other uses. The distance and elevation from the well to the house matter too, as does the type of pressure control you choose.
A qualified pump installer will size the pump and pressure tank for your situation. If the well's yield is modest, they may recommend protective controls or a storage tank and booster pump. Our articles on well yield and your pressure tank explain why sizing matters.
Before you approve a plan, ask what pump the installer recommends and why it is the right size, and what depth it will be set at. Ask what size pressure tank they propose and why, and what kind of pressure control they would use, such as a standard switch or a constant-pressure system. Find out whether the pump will have protection against running dry, whether you need a storage tank, and what warranties apply. Clear answers here save you from an undersized system that you would have to live with for years.
Understand how the pump goes into the well
For most drilled wells, the pump is a submersible pump that sits down inside the well. The crew assembles the pump, drop pipe, wiring, and any safety rope. They install a pitless adapter or similar connection in the casing, below the frost line in cold climates, so the water line can exit the well underground. Then they lower the pump into the well to the chosen depth, connect the drop pipe to the pitless adapter, and install the well cap.
This work is often done with a pump truck or hoist. It is specialized work that requires the right equipment and care, both for safety and to avoid damaging the pump, wiring, or well.
Know what to expect when the water line is trenched
The water line runs from the well to the house in a trench. Key considerations include:
Depth. In cold climates, the line needs to be buried below the local frost depth so it does not freeze. Local codes or common practice will guide this. In warmer climates, depth requirements may be different.
Route. A straight, simple route is usually best. Avoid running the line under driveways, parking areas, or future structures where possible. Avoid the septic system entirely.
Utilities. Before digging, call your local utility locate service, and mark any private buried lines.
The electrical wire. The wire that powers the pump usually runs in the same trench, in accordance with electrical codes. An electrician may need to be involved.
Tracer wire or marking. Some installers place a tracer wire or marking tape in the trench so the line can be located later. Ask whether this is included.
Backfilling. The trench should be backfilled carefully so rocks or debris do not damage the line and so the soil settles properly. Watch for settling over time, which can create a low path that channels water toward the well or the house.
Documentation. Take photos of the open trench with the line in it, and note the route relative to landmarks. This makes future repairs or digging much easier.
Plan where the water line enters your house
Where the water line enters the house matters for freeze protection and for how the pressure tank and treatment will be arranged. Common approaches include coming through a foundation wall or up through a slab. The entry point should be sealed to keep out water, air, and pests.
Plan the location of the pressure tank and any future treatment equipment near the entry point. Leave room for service access, a floor drain or drain connection if treatment will need one, and electrical outlets if treatment equipment will need power.
Set up the pressure tank and controls for steady pressure
Inside the house, garage, or well house, the installer will set up the pressure tank, a tank tee or manifold with fittings, the pressure switch or controller, and the pressure gauge. You should also see shutoff valves and a drain valve, plus a pressure relief valve if one is used, and a sampling tap if you request one.
Ask the installer to include a sampling tap before any treatment, if one is not already planned. It makes future water testing much easier and more accurate. Our guide on how to collect a well water sample and our article on whether to sample before or after a softener explain why sampling location matters.
Ask the installer to label valves and show you how the system works. Our article on how your well system works explains each part.
Get the pump wired safely on its own circuit
The pump and controls need a dedicated electrical circuit. This work is typically done by an electrician, or by a licensed pump installer where allowed, according to local electrical codes.
Ask whether the pump is on its own circuit and breaker, and whether the breaker is labeled. Ask whether there is a disconnect near the pressure tank or controls, and whether they recommend surge protection for the well circuit. If you want a generator later, ask how the well circuit should be set up to connect it safely through a transfer switch.
Our article on power outages and your well explains why planning for generator hookup early can be helpful.
See how the well connects to your home's plumbing
Once the pressure system is set up, the plumber connects it to the house's plumbing. If treatment equipment will be installed later, the plumber may leave space and fittings for it, or install a bypass.
Check the first startup so you have a working baseline
When everything is connected, the installer starts the system. They turn on power and watch the pump fill the pressure tank, then check that the pressure switch turns the pump on and off at the right pressures. They also check for leaks and run water to purge air from the lines.
At this point, the water may be cloudy, especially from a new well. This is common, but you should not drink it yet. The system still needs disinfection and testing.
Ask the installer to note the pump's on and off pressures and the tank's pre-charge. Write them down as your baseline.
Disinfect the system before you drink the water
New wells and new plumbing can pick up bacteria during construction. Disinfecting the well and plumbing before use is common practice and may be required by local rules. It is usually done by the well contractor or pump installer following state or local guidance.
Ask whether disinfection is included in their work and how it will be done. Ask how long the disinfectant should stay in the system, how the system should be flushed afterward, and where the flushed water should go. Also ask how long you should wait after flushing before collecting a test sample.
Flushing should be done in a way that does not overload the septic system or harm plants, streams, or neighbors' property. Follow the professional's instructions.
Run the first water test to learn what is in your water
After disinfection and flushing, and after the waiting period your contractor or lab recommends, test the water with a certified laboratory. Some jurisdictions require a passing test before the well is approved for use.
What to test depends on local requirements and conditions, but common starting points include:
- Bacteria, such as total coliform and E. coli
- Nitrate
- A basic set of chemical and physical parameters
Your local health department or certified lab can recommend additional tests for substances known in your area. Our testing page, our annual well testing guide, and our Contaminants page explain testing and results. Our guide on how to collect a well water sample explains how to take a proper sample.
This first test is your baseline. Every future test will be compared to it. Keep the report forever.
Respond to a problem in the first test, step by step
Sometimes the first test after a new well shows bacteria or another issue. Do not panic. Common next steps include:
- Contacting your contractor and local health department
- Repeating disinfection and flushing, if recommended
- Retesting after the recommended waiting period
- Investigating whether something in the construction or site needs correction
If the issue is a naturally occurring substance, it may call for treatment rather than a construction fix. Our treatment guide explains how to match treatment to results. Until you know the water is safe, use another source for drinking and cooking.
Wait for test results before you buy any treatment
Treatment decisions should come after testing, not before. Some issues seen right after a new well is drilled, like cloudiness, may clear up as the well is used. Others may call for treatment. Our site's approach is always the same: test first, treat second, and base decisions on evidence rather than product pitches.
If treatment is needed:
- Choose systems based on your test results
- Consider whole-house versus point-of-use options
- Plan for maintenance and ongoing costs
- Retest after installation to confirm the treatment works
Find out which inspections and approvals your well needs
Depending on your location, the well may require final inspection or approval by the health department or another agency, and a passing water test may be required before a certificate of occupancy is issued for a new home. Ask your contractor and local health department what is required and who is responsible for scheduling it.
Build a well records binder you can hand to the next owner
This is the moment to gather everything into one place. Start with the paperwork: the well permit, the well construction record, contractor invoices and contracts, inspection approvals, and warranty information. Add what you saw and learned along the way, including drilling day notes and photos, trench route photos and a sketch, and electrical information such as the breaker location. Include the details of the equipment, meaning pump, tank, and control information with models, installation dates, and settings. Finish with the health-related records: disinfection records and water test results. Keep contact information for the contractor, pump installer, electrician, plumber, and lab alongside them.
Our Well Care page explains why records matter. They help you maintain your system, diagnose problems, and sell your home someday.
Care for your new water well in its first year
Once your well is in use, learn the system by finding the shutoff, the breaker, and the pressure gauge, and record baseline pressures. Watch for cloudiness or changes, and contact your contractor if water does not clear. Protect the wellhead as landscaping and finishing work happens. Test again at the one-year mark and compare to your first test, and keep track of warranties so you can use them before they run out.
Our article on your first 30 days in a home with a well has a checklist that applies well to new systems too.
Understand storage tanks if your well yields slowly
When a new well has modest yield, the installer may recommend a storage tank and booster pump. In this setup, the well pump fills a storage tank slowly, and a separate booster pump draws from the tank to pressurize the house. It lets a well that produces water slowly still meet a household's peak demand.
A storage system adds a few things to think about. Location. Storage tanks are large and need space, protection from freezing in cold climates, and access for cleaning. Controls. Level controls tell the well pump when to fill the tank, and a pressure system runs the booster pump. Water quality. Water stored in a tank needs protection from contamination, and the tank needs periodic inspection and cleaning. Some owners add treatment after the storage tank. Power. Two pumps mean more electrical load, which matters for generator planning. Sampling. You may want sampling points both before and after the storage tank.
Ask the installer to explain how the system works, how to maintain it, and what warning signs to watch for.
Decide whether a well house makes sense
Some owners choose to put the pressure tank and controls in a small well house near the well rather than in the main house. This can make sense on some properties, such as homes without basements, properties with long distances between the well and house, or farms where the well serves several buildings.
If you build a well house, plan for freeze protection, such as insulation and a safe heat source in cold climates, and for electrical supply to code. Plan drainage so water does not collect inside, and ventilation. Leave access for service, and for pulling the pump if the well house sits near the wellhead. Keep chemicals, fuel, and storage out of it.
Landscape around the wellhead without harming it
As your home is finished, the area around the well will be graded, seeded, and landscaped. This is the last chance to set up the wellhead for decades of good protection.
Make sure the finished grade slopes away from the casing in every direction, and keep the top of the casing above ground, as required by local rules. Avoid planting trees, large shrubs, or garden beds right next to the well, and consider a simple gravel ring or lawn around the casing. A visible marker helps mowers and vehicles avoid it. Keep the path for a future service truck open, and do not cover the well with decks, planters, or decorative structures that block access.
Our article on everyday habits that protect your well covers ongoing care of the area.
Use a sample timeline to keep every trade on track
Every project is different, but a simple order of operations for new construction might look like this:
- Well drilled, cased, sealed, developed, and capped
- Wellhead protected with a barrier during construction
- Pump installed, either right away or when the house is ready for water
- Trench dug and water line and pump wire installed and documented
- Trench backfilled and marked
- Pressure tank, controls, and sampling tap installed inside
- Electrician connects the dedicated pump circuit
- Plumber connects to house plumbing
- System started and checked
- System disinfected and flushed
- Water tested by a certified laboratory
- Any required inspections completed
- Treatment installed if needed, and retested
- Final grading and landscaping around the wellhead
- Records binder assembled
Share this list with your builder and contractors, and ask each one to confirm which steps they are handling. Gaps between trades are where important steps, like disinfection and testing, most often get missed.
Avoid the seven most common post-drilling mistakes
The most common mistakes are drinking the water before disinfection and testing, and burying or damaging the wellhead during final grading. Others are running the water line under a future driveway or building, and forgetting to label the breaker and valves. People also skip a sampling tap before treatment, buy treatment before testing, and lose the paperwork.
Get quick answers to common new-well questions
How soon after drilling can the pump be installed?
Sometimes right away, sometimes weeks later, depending on construction progress and scheduling. Ask your contractor how they sequence the work.
Why is my new well water cloudy?
New wells often produce cloudy water at first, as fine particles clear. If it does not clear with use, contact your contractor.
What if the first test shows bacteria?
Contact your contractor and health department. Repeat disinfection and retesting are common next steps, and use another water source for drinking until results are satisfactory.
Do I need a sampling tap?
It is not always required, but a tap before any treatment makes accurate testing much easier for the life of the well. Ask for one during installation.
How deep should the water line be buried?
Deep enough to meet local code and, in cold climates, to stay below the frost line. Your installer will know local requirements.
Should I keep the leftover pipe and parts?
It can be handy to keep a short spare section of the same water line and the model numbers of the pump, tank, and controls. Store them with your records so a future repair can match what was installed.
When should I test again?
Test again at the one-year mark and compare the results to your first test. After that, follow the annual testing schedule public health agencies recommend, plus any additional tests your area calls for.
Review the key steps and take your next one
After the drill rig leaves, your new well still needs a pump, a water line, a pressure system, electrical and plumbing connections, disinfection, and testing before it is ready for drinking. Protect the wellhead in the meantime, size the pump system to the well and your household, trench and document the water line carefully, and ask for a sampling tap and labeled valves.
Disinfect, flush, and test with a certified laboratory before drinking, and base any treatment decisions on the results. Then gather every record into one binder. With these steps done right, your first glass of water comes with confidence, and your well is set up for a long, well-documented life.