
Well Care · Owning a Well
How Your Well System Works, From Aquifer to Faucet
A plain-language tour of a private well water system, following water from the ground through the well, pump, pressure tank, controls, and treatment to your faucet.
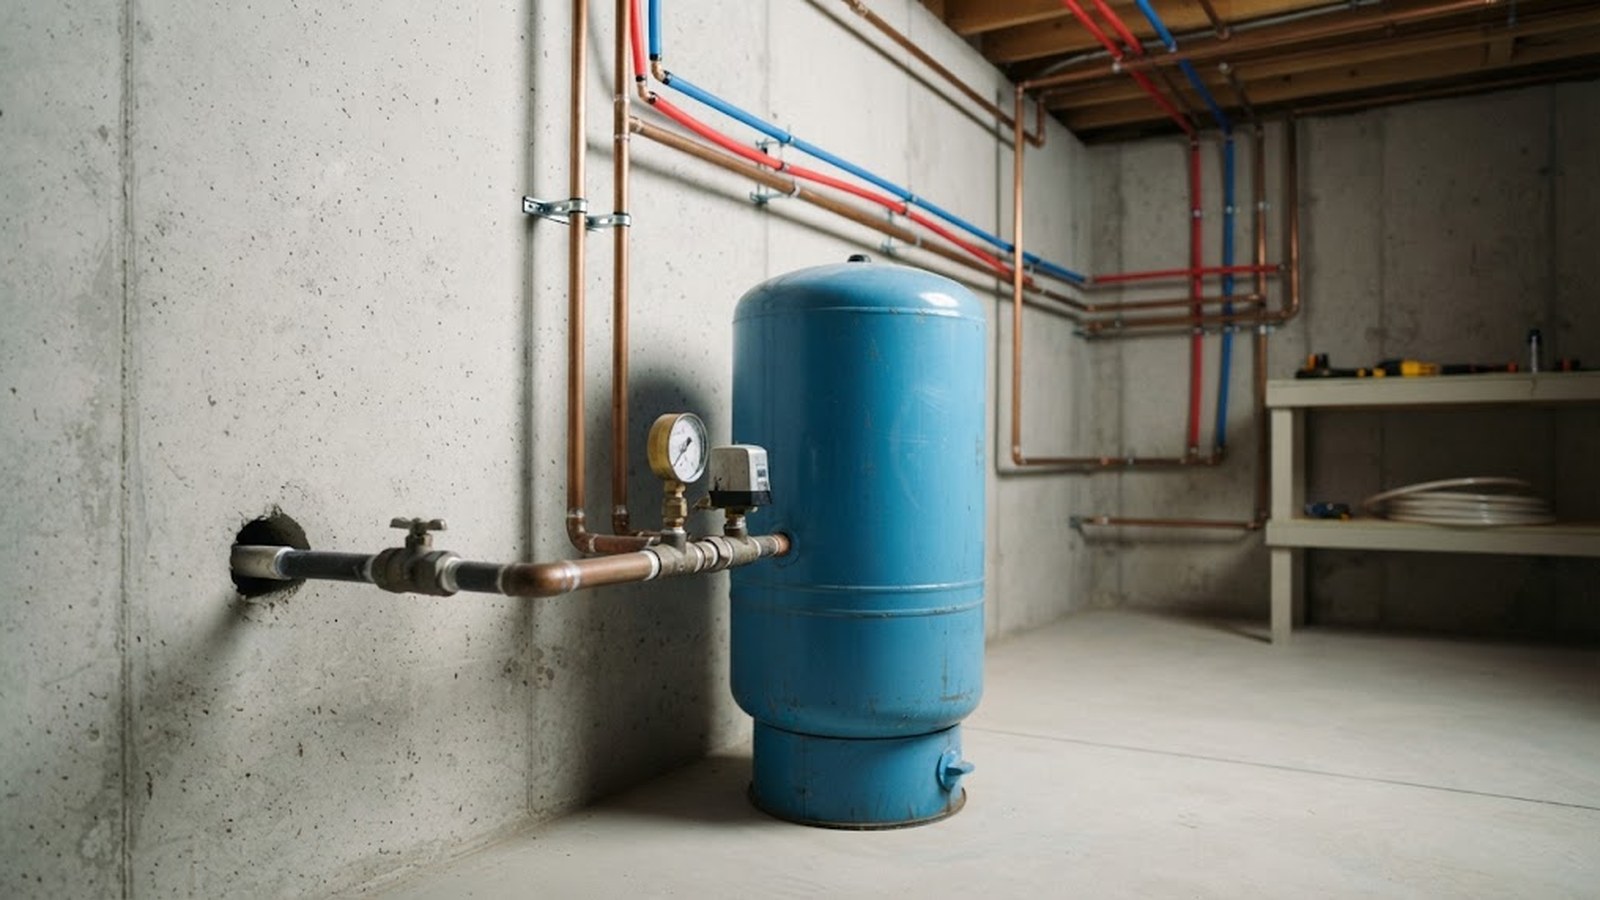
Turn on a faucet in a home with a private well and water flows out, just as it would in the city. But behind that simple moment is a small, self-contained water system that you own. It reaches down into the ground, lifts water up, stores a little under pressure, and delivers it to every tap in the house. Understanding how it works makes you a better owner. You will recognize problems sooner, talk more clearly with service professionals, and make better decisions about maintenance and treatment.
This article follows water on its journey from underground to your glass. It explains each major part in plain language, what it does, and what a homeowner can reasonably notice about it. It is not a repair guide. Well systems involve electricity, pressure, and components deep underground, and repairs belong with qualified professionals. But knowing what each part is for is the foundation of good ownership.
Learn the five jobs your well system does, from ground to tap
At its simplest, a private well system has five jobs. First, it reaches water: the well is a hole in the ground that reaches water-bearing soil or rock. Second, it protects that water, because the well's casing, cap, and seal help keep surface water and contamination out. Third, a pump lifts the water up from the well. Fourth, a pressure tank holds a small reserve under pressure, so water flows when you open a faucet. Fifth, a pressure switch turns the pump on and off, and pipes carry water through any treatment to the faucets.
Let us follow the water through each step.
Step one: understand the groundwater source your well depends on
Your water starts as precipitation. Rain and melting snow soak into the ground, move downward through soil, and eventually reach a zone where the spaces between particles or the cracks in rock are filled with water. That water-saturated zone is groundwater.
An aquifer is simply a layer of soil or rock that holds and transmits enough groundwater to supply a well. Aquifers come in many forms:
- Sand and gravel. Loose materials with lots of open space between particles can store and release water readily.
- Porous rock. Some rock, like certain sandstones, has spaces within it that hold water.
- Fractured rock. Hard rocks like granite may have little space within the rock itself, but fractures and cracks can carry water. Wells in fractured rock depend on intersecting those fractures.
- Limestone and similar rock. Some rock types have openings that have been enlarged over time by water moving through them.
The type of aquifer affects how much water a well can produce, how quickly it recovers, how its water tastes, and what naturally occurring minerals may be dissolved in it. It also affects how vulnerable the water is to contamination from the surface. Water that moves slowly through a lot of fine soil gets naturally filtered in ways that water moving quickly through fractures may not.
You do not need to know exactly what your aquifer is, although your well construction record may describe the materials the driller encountered. What matters is that your well draws from a shared underground resource connected to the land around you. What happens on the surface can, in some circumstances, reach the water below.
Step two: know what is in your well and what keeps contamination out
The well is the opening that reaches the aquifer. Wells are built in different ways, and our article on drilled, bored, driven, and dug wells explains the types. For most modern homes, the well is drilled, which means a machine bored a narrow hole deep into the ground.
A typical drilled well includes:
The borehole. The hole itself, which may extend far below the surface.
The casing. A pipe, usually steel or plastic, that lines the upper part of the borehole. The casing keeps the hole from collapsing and, importantly, helps keep shallow water and surface contamination from entering the well. In many wells, the casing extends down into a protective layer or into bedrock.
The grout or seal. Material placed in the space between the outside of the casing and the surrounding soil or rock. It helps prevent water from running down along the outside of the casing into the well. You cannot see this part, but it is one of the most important protective features.
The open hole or screen. Below the casing, water enters the well. In rock, the lower part may be open borehole. In sand and gravel, a screen, which is a pipe with slots, lets water in while keeping sand out.
The wellhead. The top of the casing that sticks up above the ground, along with the cap. This is the part you can see.
Check that your well cap keeps out insects, animals, and surface water
The well cap sits on top of the casing. A good cap is secure, fits tightly, and is designed to keep out insects, small animals, and surface water, while still letting air move in and out through a screened vent as the water level rises and falls. Our Well Care page discusses how to check the cap and casing each year.
See why no pipe shows above ground: the pitless adapter
In many modern wells, the water line from the well to the house leaves the casing underground, below the frost line in cold climates. This connection is often made with a fitting called a pitless adapter or pitless unit. It lets water exit the casing below ground without needing an open pit around the well, which is a significant improvement over older designs.
You will not see the pitless adapter, but it explains why there is often no visible pipe coming out of the side of the well above ground. The water line runs underground from the well, often in a trench, to the house.
Step three: find out how the pump moves water to your home
Water does not rise to the surface on its own in most wells. A pump lifts it.
Submersible pumps: the quiet pump you never see
Most modern drilled wells use a submersible pump. It is a long, narrow cylinder that sits down inside the well, below the water level. It pushes water up through a pipe to the surface and on to the house. Because it is submerged, it is quiet, and you usually never see it.
A submersible pump is connected to electrical wiring that runs down the well, and it is held in place by the pipe and often a safety rope or cable. When it needs service or replacement, a well professional pulls it up out of the well, which is why access to the wellhead matters.
Jet pumps: the above-ground pump you can see and hear
Some systems, especially older ones or those with shallow wells, use a jet pump. This pump sits above ground, often in a basement, well house, or crawlspace, and uses suction and a jet of water to draw water up from the well. Jet pumps are more visible and can be noisier.
Spot pump trouble early from what you can notice
You cannot see a submersible pump, but you can notice its behavior:
- How often it runs. You may hear a click from the pressure switch when it turns on and off. A pump that runs when no water is being used can suggest a leak somewhere.
- How long it runs. A pump that runs much longer than usual to reach its shutoff pressure may be struggling.
- Changes in water. Sputtering, air bursts, or sudden sand or sediment can be clues worth reporting to a professional.
- Tripped breakers. A pump circuit that trips repeatedly is a reason to call a professional, not to keep resetting it.
Step four: see how the pressure tank gives you steady water and protects the pump
Once water is lifted from the well, it goes to a pressure tank, usually located in the basement, garage, utility room, or well house.
The pressure tank solves a simple problem. Without it, the pump would have to switch on every single time anyone opened a faucet, even for a moment. That kind of constant starting and stopping wears out pumps quickly. The pressure tank stores a small amount of water under pressure. When you open a faucet, the tank pushes water out. Only after the pressure drops to a certain point does the pump switch on to refill it.
Most modern pressure tanks have an internal bladder or diaphragm that separates water from a cushion of air. The compressed air pushes on the water, providing pressure. Older tanks may not have this separation and can lose their air cushion over time.
Our article on pressure tanks explains how they work, what signs point to trouble, and why the amount of water a tank delivers between pump cycles is usually smaller than its size suggests.
Step five: read the pressure switch and gauge to see what the pump is doing
The pressure switch is the brain of a simple well system. It is usually a small box mounted on the pipe near the pressure tank. It senses the water pressure and turns the pump on when the pressure falls to a lower set point and off when it rises to an upper set point.
The pressure gauge, usually a small round dial nearby, shows the current pressure. Watching the gauge as water is used lets you see the whole cycle: pressure dropping as water flows out of the tank, the pump turning on, and pressure rising until the switch turns the pump off.
A few important notes:
- The pressure switch has live electrical connections inside. Homeowners should not open it unless they are qualified.
- Adjusting the switch settings affects how the pump and tank work together and should be done by, or with guidance from, a professional.
- Some systems use different kinds of controls, such as constant-pressure controllers, which adjust pump speed to maintain steadier pressure. These work differently from a simple switch but serve the same basic purpose.
Recognize a control box and leave it to a professional
Some pumps, depending on their design, have a separate control box, usually mounted on a wall near the pressure tank or electrical panel. It helps start and run the pump. If your system has one, a professional can explain it. Like the pressure switch, it contains electrical components and is not a homeowner repair item.
Step six: locate the valves and pipes you may need in an emergency
Between the well and your faucets, several smaller components keep the system working properly.
Check valves. One-way valves that keep water from flowing back down the well when the pump shuts off. They help the system hold pressure. They are often located at the pump, and sometimes elsewhere in the line.
Shutoff valves. Valves that let you or a professional stop water flow for maintenance or emergencies. A main shutoff near the pressure tank is important to locate. Our first 30 days article explains why.
A pressure relief valve. Some systems include a valve designed to release water if pressure gets too high, as a safety measure.
A drain or boiler valve. A small valve near the tank that lets water be drained out, often used for maintenance and sometimes for sampling. Our guide on how to collect a well water sample explains which taps are appropriate for sampling.
The water line. The pipe that carries water from the well to the house, usually buried. It can be damaged by digging, heavy vehicles, freezing, or age.
Household plumbing. Once inside, water moves through the home's pipes, which may be copper, plastic, galvanized steel, or a mix. Plumbing materials can affect water quality at the tap, which is one reason where you sample matters.
Step seven: find out whether your water treatment covers the whole house
Many well systems include treatment equipment between the pressure tank and the rest of the house. Treatment is not part of every system; it is added based on what the water needs. Sediment filters catch particles, and carbon filters handle certain tastes, odors, and some chemicals. Water softeners deal with hardness minerals, while iron and manganese filters or oxidation systems address those metals. UV disinfection systems target microorganisms, neutralizers treat acidic water, and reverse osmosis systems, often at the kitchen sink, treat drinking water.
Treatment should be chosen based on laboratory test results, not guesses. Our treatment guide compares systems and explains what each can and cannot do. Treatment also needs maintenance, and equipment that is not maintained can stop working or even create new problems.
Some systems treat the whole house, while others treat only one faucet. Knowing which is which matters when you test your water and when you decide which faucets to use for drinking and cooking.
Step eight: trace a change at the faucet back to its cause
Finally, water reaches your faucet. What comes out is the result of everything upstream: the aquifer, the well's construction and condition, the pump, the pressure tank, the plumbing, and any treatment.
When something changes at the faucet, it can help to think backward through the system. Did the change happen at all faucets or just one? Hot water only, or cold too? Before or after treatment? Suddenly or gradually? After a storm, a repair, or a power outage? These clues help you and a professional figure out where in the system to look. Our Symptom Finder and Water Problems pages walk through many common changes.
Follow one normal pump cycle from open faucet to shutoff
Here is what happens when you open a faucet in a typical system:
- Water flows out of the pressure tank, pushed by its air cushion.
- Pressure in the system gradually drops.
- When pressure reaches the lower set point, the pressure switch closes and power flows to the pump.
- The pump runs, lifting water from the well, through the water line, into the house.
- Water fills the pressure tank and supplies the faucet.
- When you close the faucet, the pump keeps running until pressure reaches the upper set point.
- The pressure switch opens, and the pump turns off.
- The check valve keeps water from flowing back down the well.
- The system holds pressure until the next time water is used.
If you watch your pressure gauge while someone runs water, you can see steps two through seven happen.
Know which parts stop working when the power goes out
Several parts of the system need power: the pump, the pressure switch and any control box, and some treatment equipment, like UV systems and softener controls. When the power goes out, the pump stops, and so do these devices. Our power outage article explains how to plan for this, including what to know about UV systems and water safety after power returns.
Know what protects your well from surface contamination
The system's first line of defense is physical protection at the surface: a good cap, a casing that extends above ground, ground sloped away from the well, a proper seal around the casing, and keeping contaminants away from the area. The best treatment system in the world cannot make up for a well that lets surface water in. Our article on everyday habits that protect your well and our Well Care page both cover this.
Plan ahead for the parts that wear out
Like any mechanical system, parts of a well system wear out over time. The pump, the pressure tank, the pressure switch, and the check valves all eventually need replacement or service. So do treatment equipment and its consumable parts, and sometimes the water line.
The well itself, if properly built and protected, can last a very long time, though it may sometimes need rehabilitation or repair. Keeping records of when parts were installed, as our Well Care page recommends, helps you anticipate replacements rather than being surprised by them.
Check whether your setup matches one of these common variations
Not every well system looks like the typical one described above. A few common variations:
Well houses and pump houses. Some properties keep the pressure tank and controls in a small separate building near the well rather than in the main house. The same parts are there, just in a different place. Well houses need attention in cold weather and should be kept free of stored chemicals and fuels.
Well pits. Some older systems have the wellhead and sometimes equipment inside a pit below ground level. Pits can collect water and debris, and they can be hazardous to enter. Many areas now discourage or restrict them for new construction. If you have one, a well professional can talk with you about its condition.
Storage tanks and booster pumps. On some low-yield wells, the well pump slowly fills a large storage tank, and a second pump, called a booster pump, pressurizes water from the storage tank for the house. This design helps a modest well meet peak demand. Our well yield article discusses it.
Constant-pressure systems. Instead of a simple on-off pressure switch, some systems use a controller that varies the pump's speed to keep pressure steadier. These often use a smaller pressure tank. They behave a little differently, and you may not see the pressure gauge swing the way it does on a traditional system.
Multiple buildings. Farms and larger properties may have one well serving the house, barns, and outbuildings through several buried lines, or several wells serving different buildings. Knowing which well serves what, and where the lines run, is especially important on these properties.
Shared wells. Some wells serve two or more homes. The system parts are the same, but ownership, maintenance, and decision-making are shared.
Describe a well problem clearly so professionals find it faster
Knowing the parts of your system makes it much easier to describe a problem. Instead of saying "the water is weird," you can say that the pressure gauge drops lower than it used to before the pump turns on, or that the pump seems to click on and off every few seconds when the shower runs. You might report that the water sputters with air at every faucet and it started after the power outage, or that only the hot water smells, and only since you replaced the water heater. You could also mention that you noticed sediment in the toilet tank after the pump was replaced.
Those kinds of observations help a professional narrow down the problem quickly, which usually saves time and money.
Get quick answers to common questions about your system
How deep is my pump?
It depends on the well. Your well construction record or service invoices may list it. A well professional can tell you when they service the system.
Why do I hear a click in the basement sometimes?
That is usually the pressure switch turning the pump on or off. Frequent, rapid clicking while water runs can be a sign the pressure tank needs attention.
Can I see my submersible pump?
No. It sits down inside the well. You notice it through its behavior: how often it runs, how long it runs, and how the pressure gauge responds.
Review the key parts, then keep up regular lab testing
Your well system is a small water utility with a few key parts. Groundwater in an aquifer is reached by a well, protected by a casing, seal, and cap. A pump lifts the water. A pressure tank stores a little under pressure. A pressure switch turns the pump on and off. Valves, pipes, and any treatment deliver it to your faucet.
Understanding these parts does not make you a well technician, and it does not need to. It makes you an informed owner who can protect the well, notice changes, keep good records, and have clear conversations with the professionals who test and repair your system. That knowledge, combined with regular laboratory testing, is the heart of taking good care of a private well.