
New Wells · Installing Your First Well
What to Expect on Drilling Day: a calm walk-through
A homeowner's guide to the day a new well is drilled, from site preparation and rig setup to noise, mud, safety, what the driller is watching for, and what happens when they reach water.
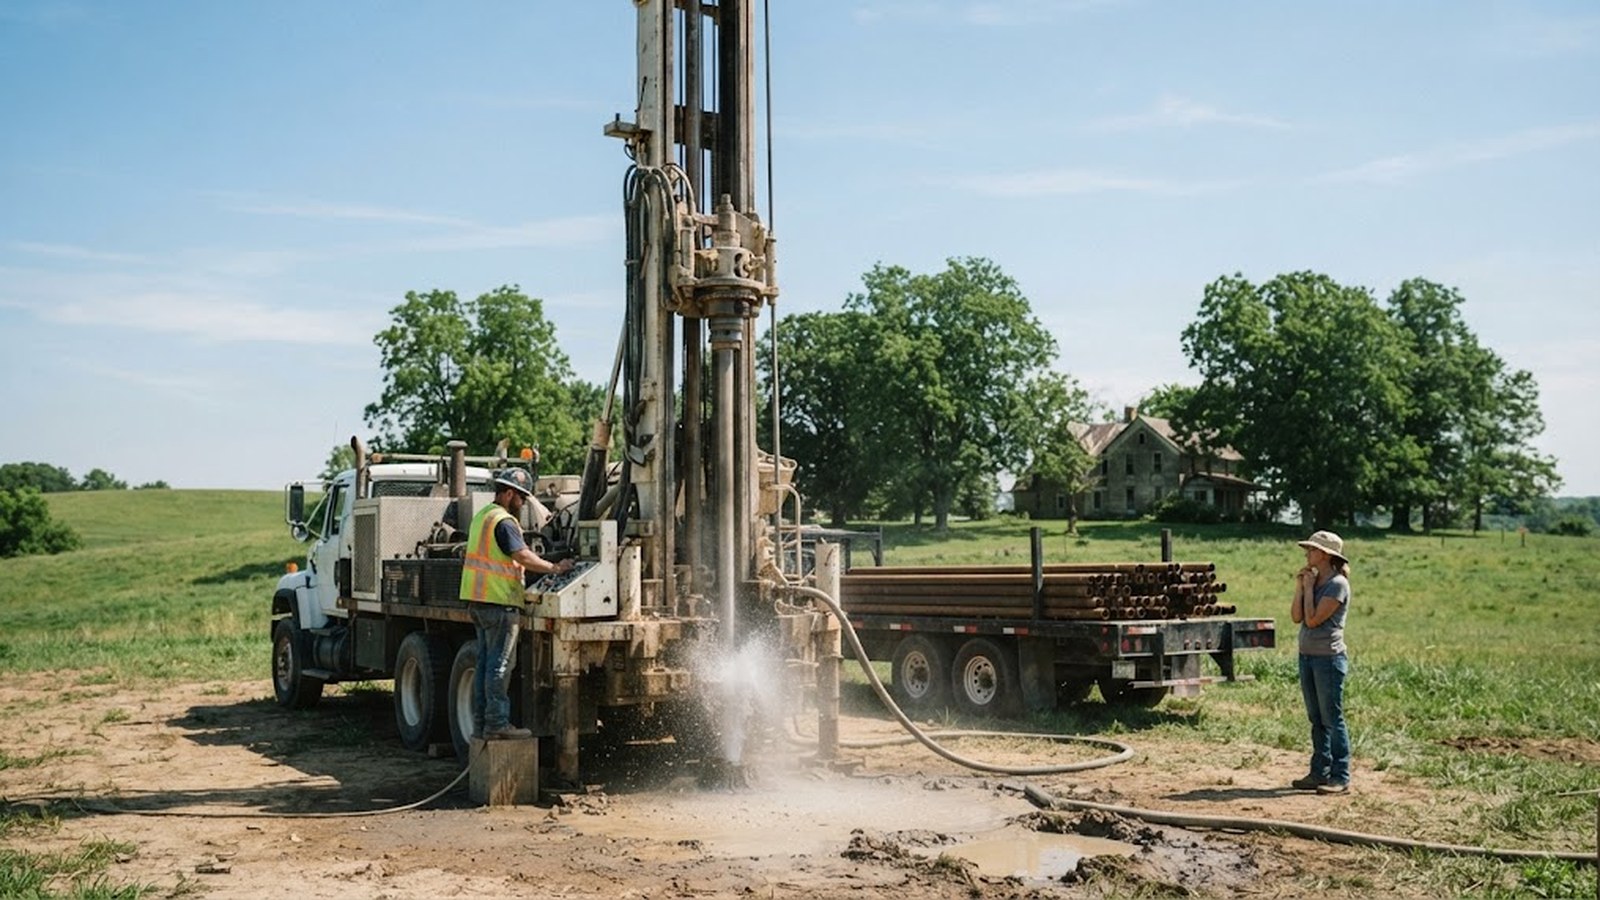
For many people building a home in the country, drilling day is one of the most memorable moments in the whole project. A large truck rumbles up the driveway, raises a tall mast into the sky, and starts boring into the ground. There is noise, water, mud, and a lot of waiting. And somewhere in there is the moment everyone is hoping for: the driller hitting water.
It can also be a little nerve-racking, especially if you do not know what to expect. How long will it take? How messy will it be? Should you stay home or go to work? What is the driller looking for? What happens if they do not find enough water?
This article walks you through a typical drilling day, from the preparations you make beforehand to what happens after the rig shuts down. Every contractor, site, and region is different, so your experience may vary. Your contractor is the best source of information about their specific process, and you should always follow their safety instructions.
Prepare your site before drilling day so the rig can start on time
Good preparation makes drilling day go smoothly. Your contractor will tell you what they need, but common steps include:
Finalize the well location. The location should already be chosen, approved, and marked. Our article on choosing where to put a new well explains how. Make sure the stake or marker is clearly visible.
Confirm permits. Make sure any required permits are in place and posted if required. Ask your contractor whether they will have the permit on site.
Locate buried utilities. Call your local utility locate service, often 811 in the United States, well before drilling day. Mark any private buried lines too, such as existing water lines, septic lines, or electrical lines to outbuildings.
Mark the septic system and other features to avoid. Rigs and support trucks are heavy and can damage septic tanks, drainfields, and buried lines. Mark them clearly so drivers can steer clear.
Prepare access. The route from the road to the well site needs to be firm, wide, and clear. Remove obstacles, trim branches, and open gates. If the ground is soft, talk to your contractor about whether gravel or other preparation is needed, or whether to wait for drier weather.
Check overhead clearance. Rigs raise tall masts. Power lines and tree branches over the site or along the route can be dangerous. Your contractor will check this, but mention any overhead lines you know about.
Plan for water and cuttings. Drilling can produce water, mud, and rock cuttings. Ask your contractor where these will go and whether any containment is needed. Keep them away from the septic system, streams, and neighbors' property.
Protect what you care about. Move vehicles, tools, and anything else away from the work area and the route. Consider protecting lawn areas you want to keep nice, but expect some disturbance.
Talk to the neighbors. Drilling can be loud, sometimes for long hours. A friendly heads-up to nearby neighbors is a considerate touch.
Plan for pets and children. Keep them indoors or well away from the work area for the whole time the rig is operating.
Watch the rig arrive and know what the crew is doing
On drilling day, the rig and one or more support vehicles arrive. The support truck may carry water, casing, grout, tools, and other supplies. The crew may include a driller and one or more helpers.
The crew will usually start by confirming the well location with you and checking the site for access, levelness, and hazards. Then they position the rig over the well location and level and stabilize it, often using hydraulic jacks or outriggers, so it stays steady under load. Once the mast is raised, they set up tools, supplies, and any water or mud handling. Confirming the spot with you at the start is your chance to catch a mistake before it becomes a hole in the wrong place.
This setup can take some time, especially on uneven ground.
Keep yourself and your family safe around the rig
A drilling site is an active industrial work zone. For your safety and the crew's:
- Stay out of the work area unless the crew invites you in.
- Follow the crew's instructions at all times.
- Keep children and pets away.
- Stay clear of the rig, moving equipment, and suspended loads.
- Do not approach the borehole.
- Be aware of noise, and use hearing protection if you will be nearby for long.
- Keep vehicles and visitors away from the route and work area.
If you want to watch, ask the crew where you can stand safely. Many drillers are happy to have an interested homeowner watch from a distance and may explain what is happening during breaks.
Know what drilling looks and sounds like so nothing alarms you
Once drilling begins, you will notice:
Noise. Rigs are loud. Engines, compressors, and the drilling itself can make a lot of noise, sometimes for many hours.
Vibration. You may feel vibration near the rig.
Water and mud. Depending on the method, drilling may produce water, mud, or a slurry of rock dust and water. Some methods blow cuttings out of the hole with air, producing a spray or cloud of dust and water.
Cuttings. Pieces of soil and rock come up from the hole. The driller watches these closely.
Stops and starts. Drilling is not continuous. The crew adds drill pipe, changes tools, checks progress, and sometimes pauses to assess conditions.
Our article on drilled, bored, driven, and dug wells describes common drilling methods in general terms.
Learn what the driller watches, and why it shapes your well
While the rig is running, the driller is paying close attention to several things:
The materials coming up. Changes in color, texture, and type of material tell the driller what layers they are passing through. They often keep a log of these observations, which becomes part of the well construction record.
Drilling speed and feel. How fast the drill advances, and how it feels, tells them about the hardness of the ground.
Water. The driller watches for signs of water entering the hole, such as changes in the returns, increased water flow, or changes in pressure.
Depth. They track how deep they are and compare it to local experience and your estimate.
Hole stability. In loose materials, they watch for signs that the hole might collapse, which affects how and when they install casing.
Understand how casing and sealing protect your water
At some point during drilling, the crew installs casing, the pipe that lines the upper part of the well. Depending on the method and geology, casing may be installed as drilling proceeds or after the hole reaches a certain depth.
Once the casing is in place, the space between the casing and the surrounding ground is sealed with grout or another approved material, according to state or local rules. This seal is an important protective feature. It helps prevent surface water and shallow water from running down the outside of the casing into the well.
Casing and sealing may happen on the same day as drilling or on a following day, depending on the process and any required curing time.
Find out how the driller decides when to stop drilling
The moment of finding water is not always dramatic. Sometimes the driller notices a gradual increase in water. Sometimes a fracture opens up and water rushes in. Often, the driller will continue drilling past the first water to reach a level that provides adequate yield and storage, or to reach a better-protected zone.
The driller decides when to stop by weighing the amount of water entering the well, the depth, local experience, the household's needs, and your contract and any agreed limits. No single number settles it, so the decision rests on all of these together.
If the driller expects to go deeper than your estimate or reach an allowance limit, a good contractor will contact you before continuing, as our article on comparing well drilling quotes recommends. Make sure you can be reached on drilling day.
Know your options if the well does not produce enough water
Sometimes a well does not produce as much water as hoped. The driller may:
- Continue drilling deeper
- Suggest a method to improve yield in some types of rock
- Recommend stopping and considering a second location
- Suggest a storage tank and booster pump to make a modest yield work
This is where your contract's dry hole or low-yield policy matters. Stay calm, ask questions, and ask the driller to explain the options and costs before deciding. Our article on well yield and flow tests explains how yield works and why modest yields can still serve a household with the right system.
Expect muddy water while the well is developed for clear flow
After drilling, the well is typically developed. Development removes fine sediment and drilling fluids from the well and the surrounding formation so water can enter freely and clearly. The driller might pump, surge, or blow air into the well until the water runs clearer.
This can take some time and may produce more muddy or cloudy water. It is a normal part of finishing a well.
Ask how much water your well gives, and write down the result
The driller will usually check how much water the well produces, often by pumping or blowing water out and observing the flow. This may be a basic check on drilling day or a longer test later. The results help determine the right pump and whether storage might be needed. Ask what kind of test was done and write down the results.
Plan your schedule: how long drilling usually takes
Drilling time varies a lot. Some wells are drilled in part of a day. Others take several days, especially deep wells, hard rock, difficult conditions, or wells that need extra casing work. Setup, casing, sealing, development, and cleanup add time.
Ask your contractor for an estimate, but understand that the ground can change the schedule. Weather, equipment issues, and unexpected conditions can also cause delays.
See what the crew leaves behind when the rig finishes
When drilling and development are complete, the crew will:
- Install a temporary or permanent cap on the well
- Remove the rig and equipment
- Clean up the site to the extent agreed in your contract
- Leave the wellhead protected until the pump is installed
The site may look rough: tire tracks, mud, piles of cuttings, and disturbed ground. How much cleanup is included varies by contract. Ask in advance.
Ask these questions before the crew leaves to get your well facts
Before the crew leaves, ask:
- How deep is the well?
- How deep does the casing go?
- At what depth did you find water?
- What was the static water level?
- What yield did you observe, and how was it measured?
- What materials did you drill through?
- Was anything unusual encountered?
- When will the well construction record be filed, and can I get a copy?
- When will the pump be installed?
- What should I do to protect the well until then?
- When should the water be tested?
Write down the answers. They are the first entries in your well records.
Guard the open wellhead until the pump goes in
Between drilling and pump installation, the well is especially vulnerable. Protect it by keeping the cap secure, so nothing can fall in or wash in. Mark the wellhead clearly so construction equipment does not hit it. Keep fill, debris, and materials away from the casing, and make sure the ground does not slope toward the wellhead, so runoff does not run toward the well. Keep fuel, chemicals, and concrete washout away from the well as well, since the well has no pump or finished protection yet.
Our article on choosing where to put a new well includes tips for protecting the site during construction.
Find out whether an inspector will visit on drilling day
In some areas, a health department or state inspector may visit during construction, especially to observe casing and grouting. Ask your contractor in advance whether an inspection is required and when it is likely to happen. If an inspector visits, they may check the location, setbacks, casing, and seal. If you are present, it is a good chance to ask questions about local requirements for testing and approval before the well can be used.
Get and read your well construction record
After drilling, the contractor typically prepares a well construction record, sometimes called a well log or well completion report, and files it with the state or local agency where required. It usually includes the location, depth, casing details, sealing information, materials encountered, static water level, and yield observations. Ask for a copy and compare it with your drilling day notes. This single document will be one of the most useful records you ever keep about your property, for service calls, testing decisions, and eventually a sale.
Prepare for a replacement well on a home you already live in
If you are drilling a replacement well at an occupied home, drilling day has a few extra considerations:
- Your lawn and landscaping will likely be disturbed.
- Your existing water system may need to remain in service until the new well is connected, or you may need temporary water.
- The old well may need to be sealed. Ask whether the contractor can do this at the same time.
- Existing buried lines and the septic system must be carefully avoided.
Plan for rain, cold, heat, and lightning on drilling day
Weather can affect drilling day more than homeowners expect.
Rain. Wet ground can make access difficult or impossible for a heavy rig. A site that is firm in dry weather can become soft enough to trap a truck after heavy rain. Contractors may postpone if conditions are too wet. Rain also increases the amount of mud and runoff on the site.
Freezing weather. In cold climates, drilling can continue in winter, but frozen ground, snow, and ice add challenges. Water used in drilling can freeze, and equipment may need extra care. Frozen ground can actually help access in some cases, but thawing can make it soft again quickly.
Heat and wind. Hot, dry, windy conditions can create dust, especially with air drilling methods. The crew may need to manage dust and debris.
Lightning. Rigs raise tall metal masts. Crews typically stop work during lightning.
If weather looks questionable, ask your contractor how they make the call and how they will let you know about delays.
Read the cuttings to see what layers your well passes through
If you watch from a safe distance, you may notice the color and texture of the material coming out of the hole change as drilling goes deeper. Near the surface, cuttings are often soil, sand, gravel, or clay. Deeper down, they may turn into rock chips or fine rock powder, sometimes changing color from one layer to the next. Water may appear gradually or suddenly.
Each change tells the driller something about the layers underground. If you are curious, ask the driller during a break what they are seeing. Many drillers enjoy explaining it, and it helps you understand the well construction record when you receive it.
Record the day with photos and notes you will want later
Drilling day is a one-time event, and it produces information you will want later. Consider taking photos of the site before, during, and after drilling, from a safe distance. Photograph the rig in position so the exact well location is documented relative to the house and landmarks, and photograph the finished wellhead. Note the times the crew arrived, began drilling, reached water, and finished, and write down anything the driller told you about depth, water, casing, and yield.
Years later, these photos and notes can help a service professional, a future buyer, or you remember exactly how the well was built.
Prepare for the surprises that catch most homeowners off guard
A few things catch homeowners off guard. It may take longer than expected, because setup, tool changes, casing, and development all add time beyond the drilling itself. It may be messier than expected: mud, water, and cuttings can spread over a wide area, and tire tracks can be deep. The depth may differ from the estimate, since the ground decides and it may be shallower or deeper than expected.
The water may be cloudy at first, because fresh wells often produce muddy or cloudy water until they are fully developed and used for a while. The crew may also need a decision from you. If depth goes beyond an allowance or water is scarce, the driller may need your input quickly. And the site may need more restoration than you planned, so ask ahead about what cleanup is included.
Knowing these possibilities in advance makes the day far less stressful.
Decide whether you need to be home all day
Many homeowners wonder whether they need to be present all day. It is not always necessary, but it helps to be there at the start, to confirm the location and access with the crew, and at the end, to ask questions and see the finished wellhead. In between, being reachable by phone is what matters most, because the driller may need a decision about depth or next steps. If you cannot be there at all, ask the contractor to call you at key moments and to send photos of the finished well and the site.
Support the crew so the work goes safely and well
Drilling crews work long, physical days, often outdoors in all kinds of weather. You are not expected to provide anything, but small courtesies are appreciated: clear directions to the site, a place to park support vehicles, access to a restroom if practical, and a friendly check-in. Most importantly, be reachable by phone, and stay out of the way so the crew can work safely.
Set your expectations for how drilling day feels
People describe drilling day in different ways: exciting, stressful, fascinating, loud. It can feel like a long wait punctuated by moments of anticipation. It helps to remember a few things:
- You have done the research and planning, and you have hired a qualified contractor.
- The driller has done this many times.
- Most wells find adequate water.
- If there are challenges, there are usually options.
Bring a chair, a thermos, and some patience if you want to watch. Or go about your day and ask the driller to call with updates.
Quick answers about noise, mess, septic, and watching
How loud is well drilling?
It can be quite loud, sometimes for many hours. Let neighbors know in advance and plan for pets and young children.
Will the site be a mess?
Expect mud, water, cuttings, and tire tracks. Ask your contractor what cleanup and restoration is included.
Can drilling damage my septic system?
Heavy equipment can damage tanks, drainfields, and buried lines. Mark them clearly and keep the rig's route away from them.
Can I watch the drilling?
Usually, from a safe distance that the crew chooses. Ask before approaching, and follow the crew's safety instructions.
Review the drilling day checklist, then plan pump and testing
Drilling day is when your well goes from a stake in the ground to a real source of water. Prepare the site with clear access, marked utilities and septic, overhead clearance, and a plan for water and cuttings. On the day, stay safe, stay reachable, and let the crew work. The driller will watch the materials, the drilling, and the water, install and seal the casing, develop the well, and check its yield.
Before the crew leaves, ask about depth, casing, water level, yield, and paperwork. Protect the new wellhead until the pump is installed, and plan the next steps: pump installation, connection to the house, disinfection, and testing. Our article on after the drill rig leaves explains what comes next.